2.2.8. Install as a VM using AWS
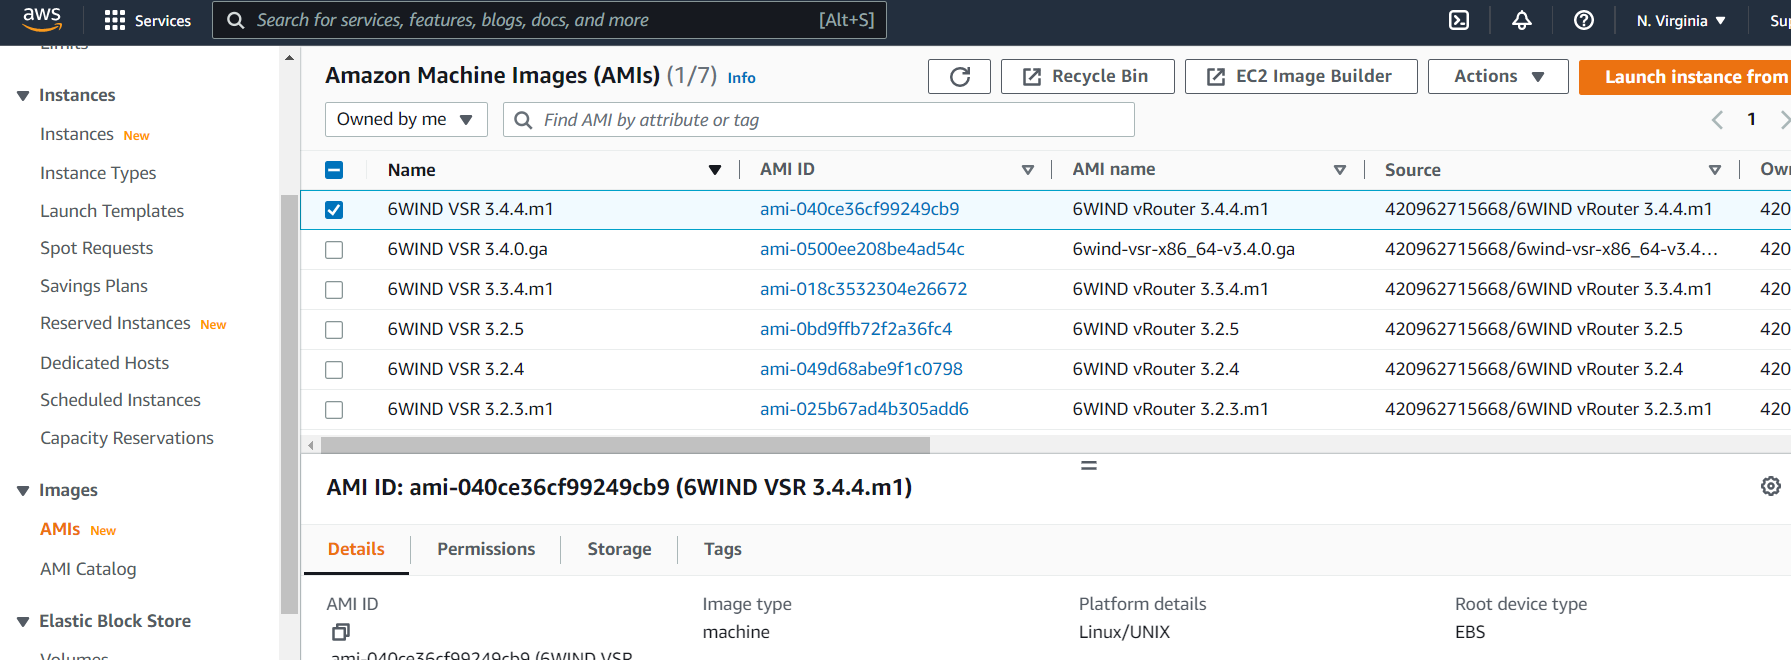
The Virtual Service Router private AMI image provides a simple way to deploy Virtual Service Router in AWS. Access to the AMI image must be requested to the 6WIND support team through the customer zone.
Once access is granted, the Virtual Service Router AMI will be available in the AWS management
console when selecting AMIs > Images.
Launch AWS Instance
From the EC2 homepage, select Instances > Launch Instance.
Step 2: choose instance type
This AMI requires either Intel 82599 VF adapters or ENA adapters. Please make sure to select an instance type that supports these adapters.
Step 3: configure instance
In AWS, console access is provided through the network and relies on
cloud-init. cloud-init configuration must be provided in Advanced Details >
User data.
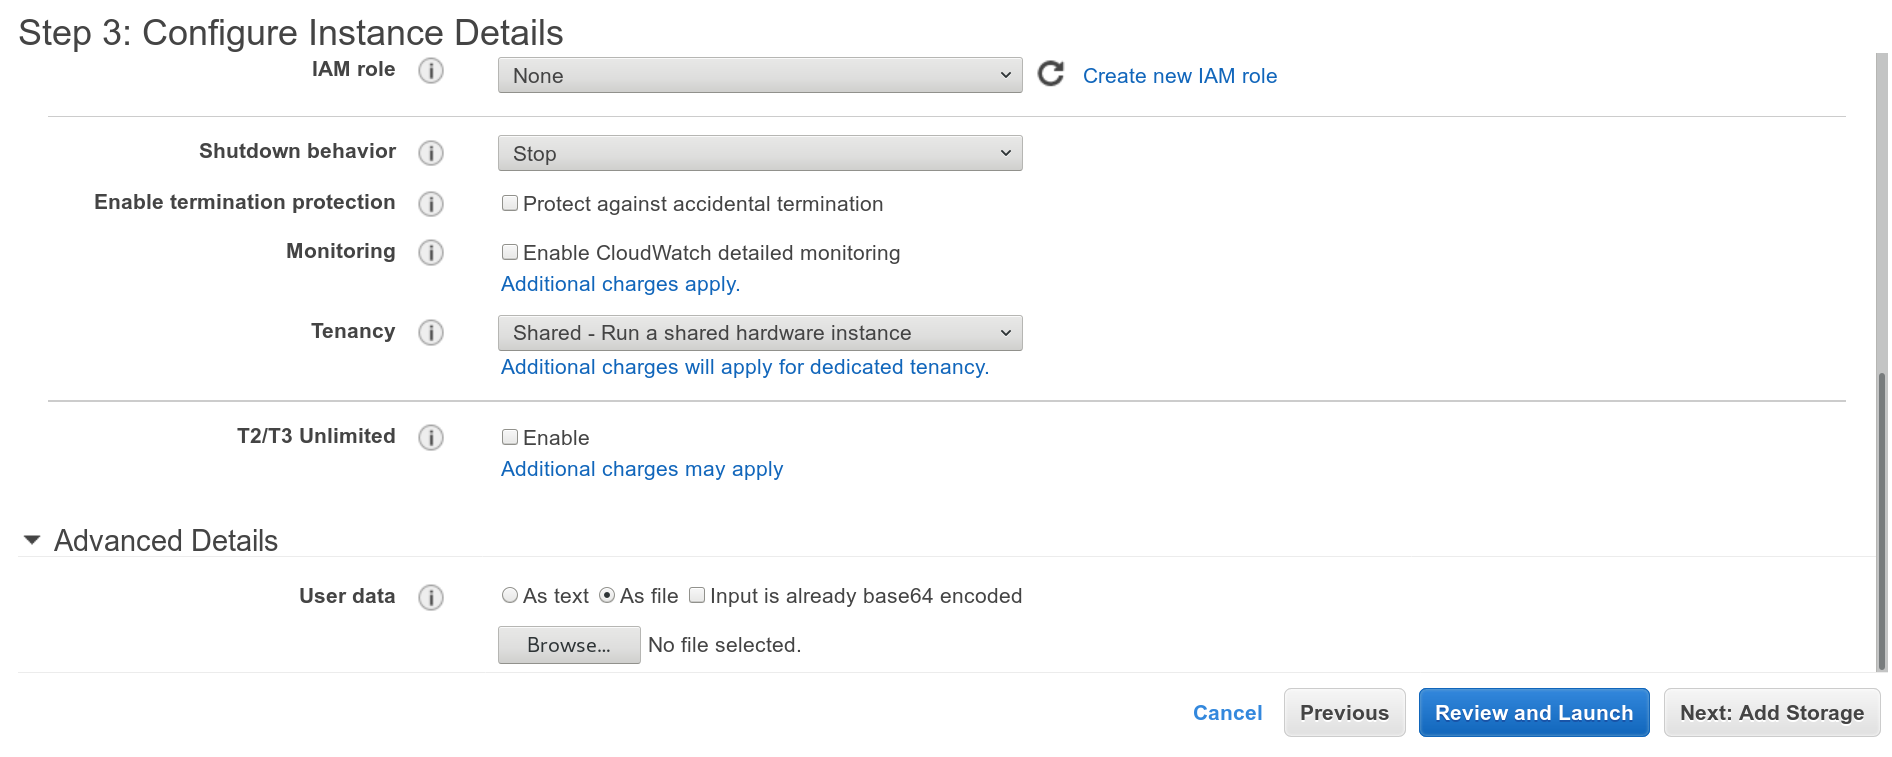
In the following example, we pre-install the license file (make sure you replace the contents by your own). We also upload a startup configuration for the CLI.
This sample CLI configuration fulfills the minimal requirements to start Virtual Service Router with high performance. It consists in enabling DHCP on the first network interface, dedicating that interface to the fast path and enabling VLAN stripping.
#cloud-config
write_files:
- path: /run/vrouter.startup
   content: |
      {
         "vrouter:config": {
            "vrouter-system:system": {
               "vrouter-license:license": {
                 "online": {
                    "serial": "xxx"
                 }
               }
            },
            "vrf": [
               {
                  "name": "main",
                  "vrouter-interface:interface": {
                     "physical": [
                        {
                           "name": "pub1",
                           "port": "pci-b0s5",
                           "ipv4": {
                              "dhcp": {
                                 "enabled": true
                               }
                            }
                         }
                      ]
                   }
                }
             ],
             "vrouter-system:system": {
                "vrouter-fast-path:fast-path": {
                   "port": [
                      "pci-b0s5"
                   ],
                   "advanced": {
                      "vlan-strip": true
                   }
                }
             }
          }
       }
 runcmd:
 - [/usr/bin/sysrepocfg, -m, vrouter, -d, startup, -f, json, --import=/run/vrouter.startup]
 - [/usr/bin/sysrepocfg, -m, vrouter, -C, startup]
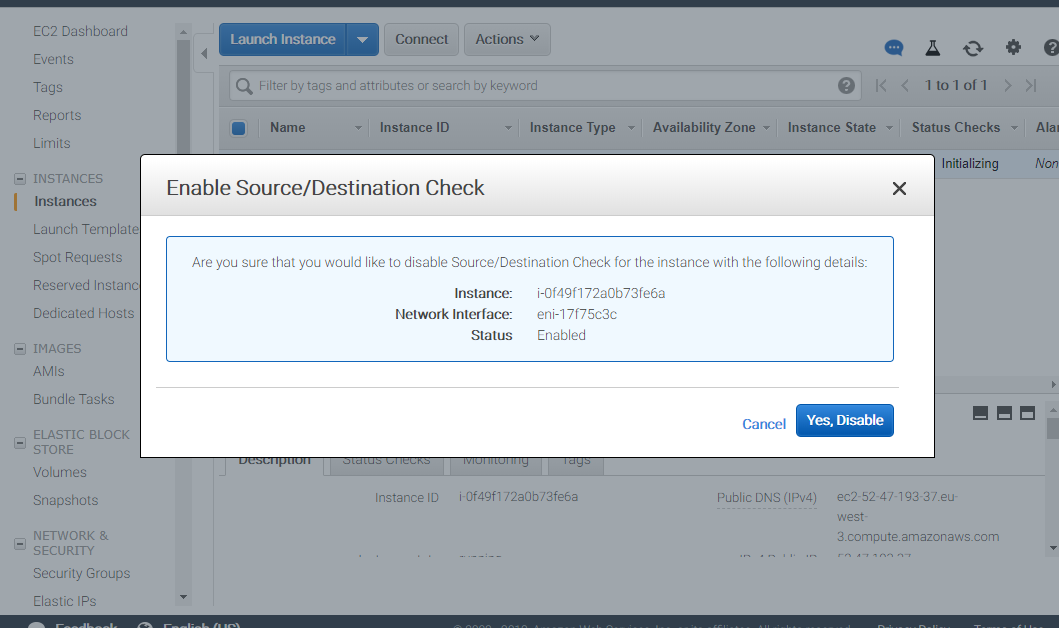
Activate AWS IP forwarding
By default, AWS forbids IP forwarding. It must be enabled from the management console after the instance is launched as follows.
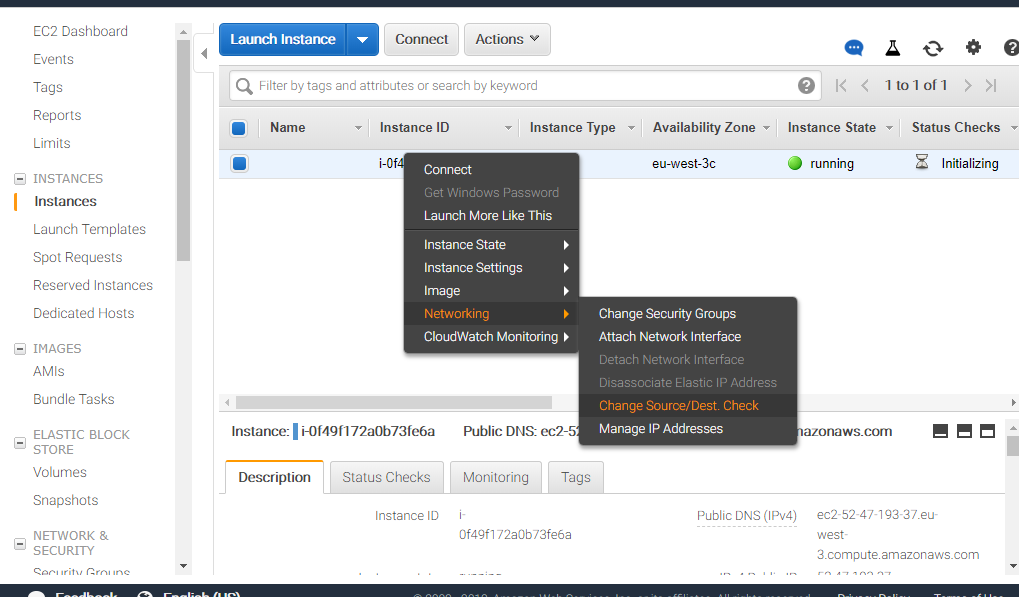
The next step is to perform your first configuration.
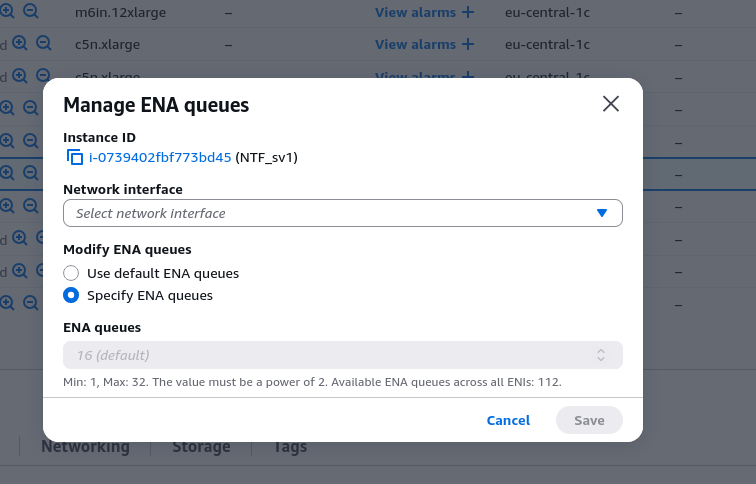
ENA queues
For instance types with more than 32 cores using ENA , ensure the number of ENA queues matches the number of cores allocated to the fast-path. Alignment between these two values is required to achieve optimal traffic distribution across all cores.
Stop the instance before applying these changes.
Refer to official documentation for more details Ena queues.