2.2.8. Install as a VM using AWS
The Turbo CG-NAT private AMI image provides a simple way to deploy Turbo CG-NAT in AWS. Access to the AMI image must be requested to the 6WIND support team through the customer zone.
Once access is granted, the Turbo CG-NAT AMI will be available in the AWS management
console when selecting AMIs > Private Images.
Launch AWS Instance
From the EC2 homepage, select Instances > Launch Instance.
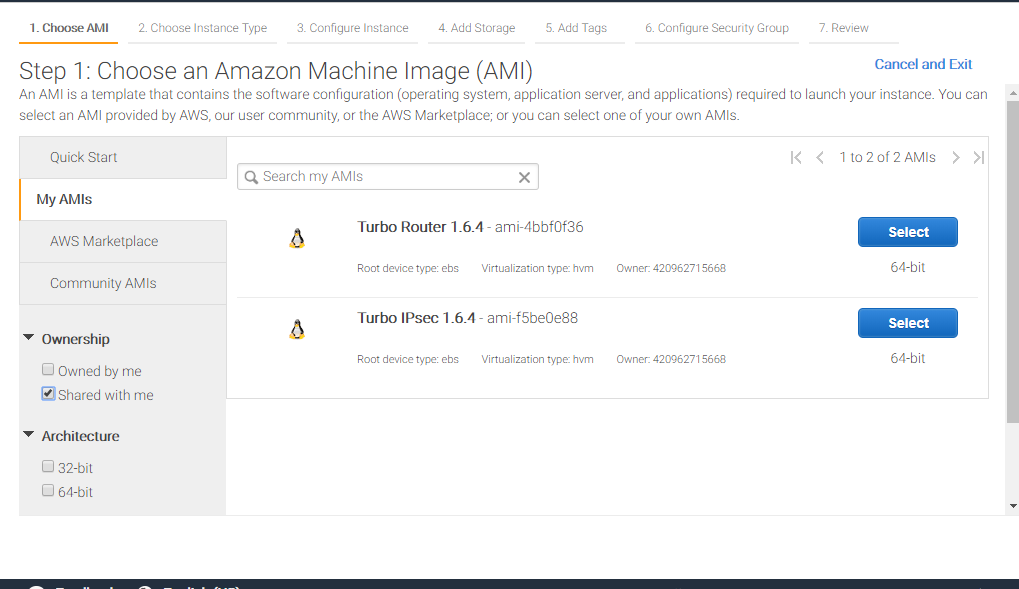
Step 2: choose instance type
This AMI requires either Intel 82599 VF adapters or ENA adapters. Please make sure to select an instance type that supports these adapters.
Step 3: configure instance
In AWS, console access is provided through the network and relies on
cloud-init. cloud-init configuration must be provided in Advanced Details >
User data.
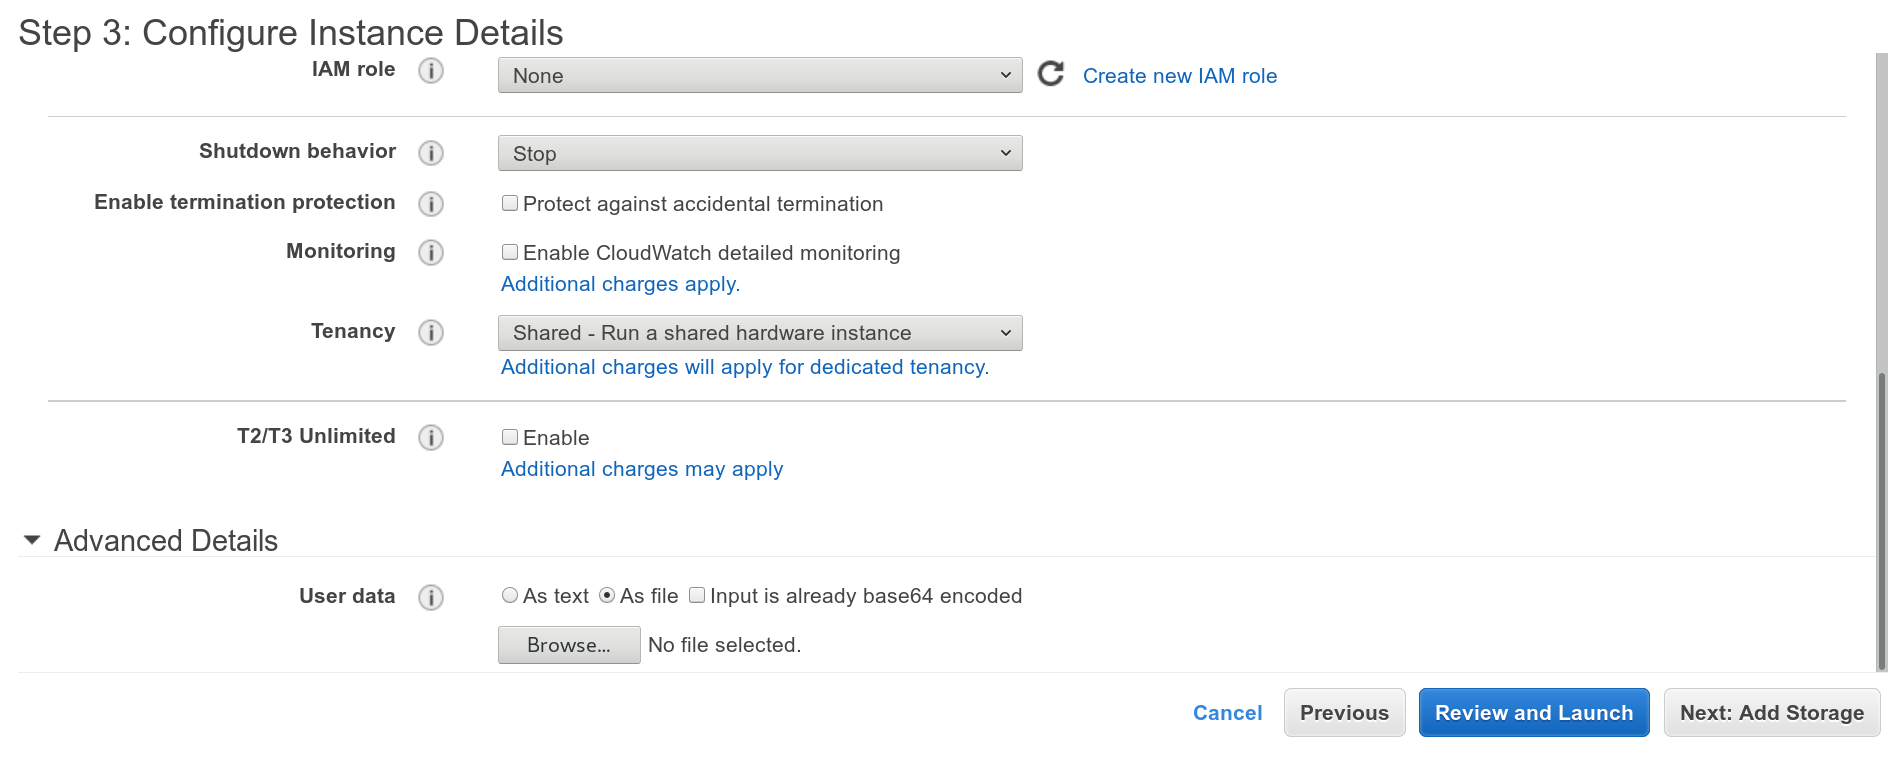
In the following example, we pre-install the license file (make sure you replace the contents by your own). We also upload a startup configuration for the CLI.
This sample CLI configuration fulfills the minimal requirements to start Turbo CG-NAT with high performance. It consists in enabling DHCP on the first network interface, dedicating that interface to the fast path and enabling VLAN stripping.
#cloud-config
write_files:
- path: /etc/turbo.lic
  content: |
   LICENSE 6wind turbo-router 01.99.99 permanent uncounted
     hostid=isv=628CE7A75DA9EFB7B3A2D3CDEB566889 customer=yourcompany
     _ck=c082fce984 sig="60PG4527MCR2KEKTD2UP7TRN18G1R6GDJCUM2XH508A03PHQ
     BQ168E3GWWK3VQ43TK0YPQ01KWVG"
- path: /etc/sysrepo/data/vrouter.startup
   content: |
      {
         "vrouter:config": {
            "vrf": [
               {
                  "name": "main",
                  "vrouter-interface:interface": {
                     "physical": [
                        {
                           "name": "pub1",
                           "port": "pci-b0s5",
                           "ipv4": {
                              "dhcp": {
                                 "enabled": true
                               }
                            }
                         }
                      ]
                   }
                }
             ],
             "vrouter-system:system": {
                "vrouter-fast-path:fast-path": {
                   "port": [
                      "pci-b0s5"
                   ],
                   "advanced": {
                      "vlan-strip": true
                   }
                }
             }
          }
       }
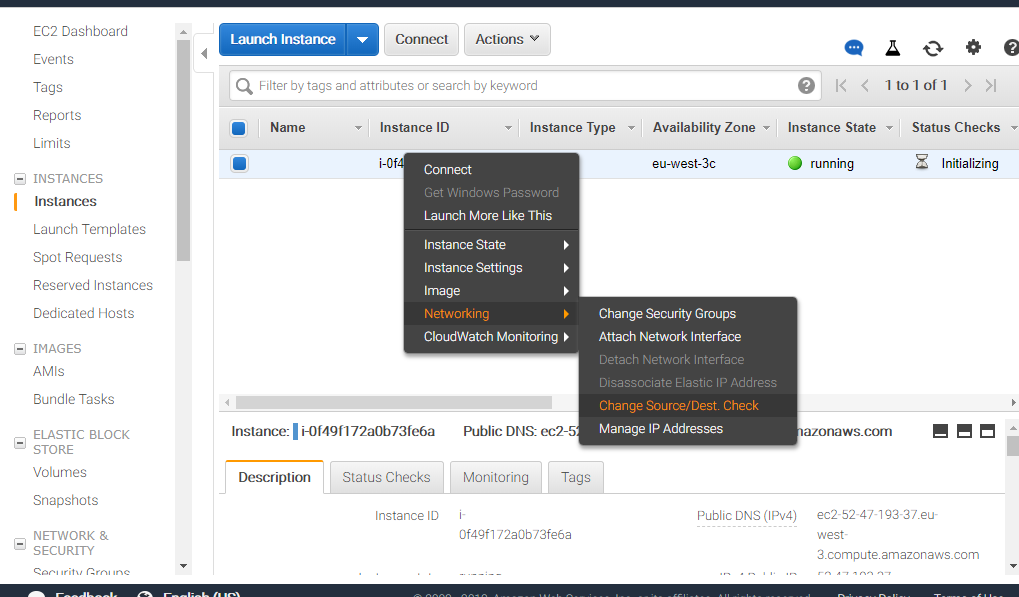
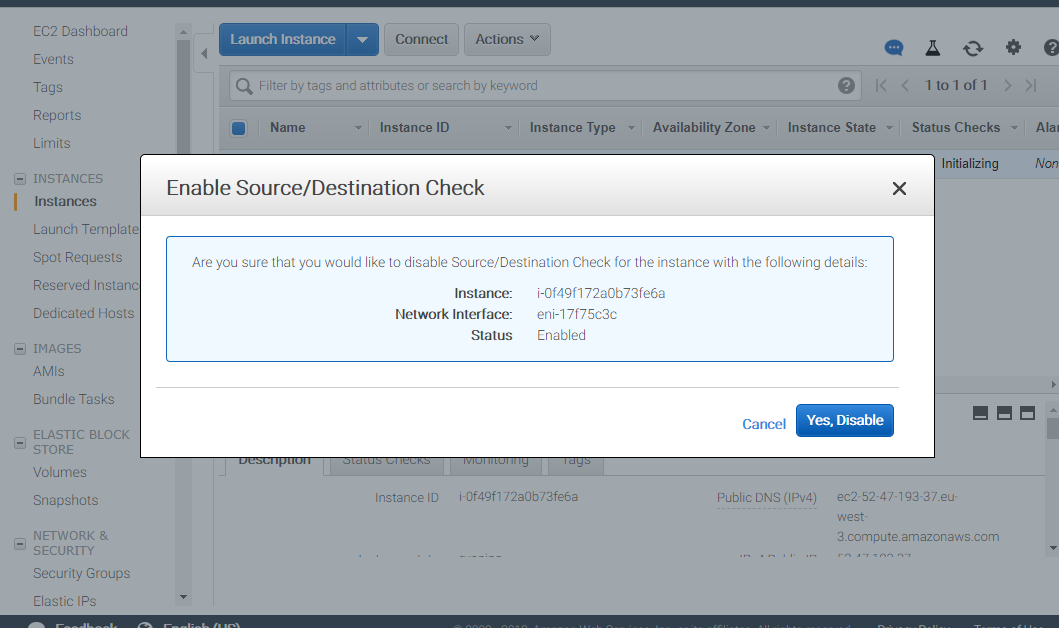
Activate AWS IP forwarding
By default, AWS forbids IP forwarding. It must be enabled from the management console after the instance is launched as follows.
The next step is to perform your first configuration.