3.2. VSR Container Deployment into OCP cluster
3.2.1. OCP Node Configuration
In order to enable unsafe sysctls (some will be used by the Virtual Service Router pod), we use KubeletConfig Custom Resource.
Create the KubeletConfig Custom Resource mcp-sysctl.yml as follows:
apiVersion: machineconfiguration.openshift.io/v1
kind: KubeletConfig
metadata:
  name: custom-kubelet
spec:
  machineConfigPoolSelector:
    matchLabels:
      custom-kubelet: sysctl
  kubeletConfig:
    allowedUnsafeSysctls:
      - "net.netfilter.*"
      - "net.ipv4.*"
      - "net.ipv6.*"
Note
This file, like the new two ones, can be downloaded from the 6WIND deployment guide repository.
Add a label to the machine config pool where the containers with the unsafe sysctls will run:
# oc get machineconfigpool
NAME     CONFIG                                             UPDATED   UPDATING   DEGRADED   MACHINECOUNT   READYMACHINECOUNT   UPDATEDMACHINECOUNT   DEGRADEDMACHINECOUNT   AGE
master   rendered-master-7111ca7990aa46ae3919aa7956aad56f   True      False      False      1              1                   1                     0                      29h
worker   rendered-worker-a8f9321babd5b5f19fc722c8884947c6   True      False      False      0              0                   0                     0                      29h
# oc label machineconfigpool master custom-kubelet=sysctl
# oc label machineconfigpool worker custom-kubelet=sysctl
Apply the configuration:
# oc create -f mcp-sysctl.yml
Wait for the configuration to be applied and for the node reboot. This can take few minutes.
Then, you can check that changes are applied:
# oc describe kubeletconfig custom-kubelet
[...]
Spec:
Kubelet Config:
 Allowed Unsafe Sysctls:
   net.ipv4.*
   net.ipv6.*
   net.netfilter.nf_conntrack_events
Machine Config Pool Selector:
 Match Labels:
   Custom - Kubelet:  sysctl
Status:
 Conditions:
   Last Transition Time:  2022-12-28T11:07:31Z
   Message:               Success
   Status:                True
   Type:                  Success
See also
Using sysctls in containers to find more informations from Red Hat Documentation.
In order to configure Hugepages on the node, we use Node Tuning Operator.
Create a file as follows:
apiVersion: tuned.openshift.io/v1
kind: Tuned
metadata:
  name: hugepages2
  namespace: openshift-cluster-node-tuning-operator
spec:
  profile:
  - data: |
      [main]
      [sysctl]
      vm.nr_hugepages=10540
    name: openshift-node-hugepages

  recommend:
  - label: hugepages
    priority: 20
    profile: openshift-node-hugepages
Add a label to the node where the hugepages configuration will be applied:
# oc get nodes
NAME      STATUS   ROLES           AGE   VERSION
ocp-sno   Ready    master,worker   30h   v1.24.6+5658434
# oc label nodes master-sno hugepages=true
Apply the configuration:
# oc create -f huge.yml
Then, you can Connect through ssh to the OCP node, and check that hugepages are configured:
# cat /proc/meminfo
[...]
HugePages_Total:    5861
HugePages_Free:     5861
HugePages_Rsvd:        0
HugePages_Surp:        0
Hugepagesize:       2048 kB
[...]
Note
To connect to the OCP node, use the ssh key created during the deployment
of the SNO OCP cluster. The ssh key is available in the home directory,
in the .ssh directory.
Also use the IP address of the node (VM) with the user core for ssh.
For example:
ssh -o "StrictHostKeyChecking no" -i ~/.ssh/id_rsa_ocp core@192.168.100.7
See also
Managing Huge Pages to find more informations from Red Hat Documentation.
Then, in order to be taken into account, restart kubelet in the ocp node.
# sudo -i
# systemctl restart kubelet
In order to configure SELinux to run in permissive mode:
List existing MachineConfig objects to determine how to label your machine config:
# oc get MachineConfig
NAME                                               GENERATEDBYCONTROLLER                      IGNITIONVERSION   AGE
00-master                                          7649b9274cde2fb50a61a579e3891c8ead2d79c5   3.4.0             37d
[...]
Create a MachineConfig object file that identifies the SELinux kernel argument as follows:
apiVersion: machineconfiguration.openshift.io/v1
kind: MachineConfig
metadata:
  labels:
    machineconfiguration.openshift.io/role: master
  name: 05-master-kernelarg-selinuxpermissive
spec:
  kernelArguments:
    - enforcing=0
Create this new machine config into the Cluster:
# oc create -f 05-master-kernelarg-selinuxpermissive.yml
machineconfig.machineconfiguration.openshift.io/05-master-kernelarg-selinuxpermissive created
Check the machine configs to see that the new one was added:
# oc get MachineConfig
NAME                                               GENERATEDBYCONTROLLER                      IGNITIONVERSION   AGE
00-master                                          7649b9274cde2fb50a61a579e3891c8ead2d79c5   3.4.0             37d
[...]
05-master-kernelarg-selinuxpermissive                                                                           61s
Wait for the node where the machine config is applied to reboot. Once the node has restarted, we can verify the MachineConfig was applied by accessing the node and then running the following command from this node:
# cat /proc/cmdline
Ensure enforcing=0 is available in the output of the command.
See also
Postinstallation machine configuration to find more informations from Red Hat Documentation.
Also, collect the following informations:
# lspci -vv | grep -i eth
[...]
00:08.0 Ethernet controller: Intel Corporation X540 Ethernet Controller Virtual Function (rev 01)
00:09.0 Ethernet controller: Intel Corporation X540 Ethernet Controller Virtual Function (rev 01)
# lspci -s 00:08.0 -k -n
00:08.0 0200: 8086:1515 (rev 01)
     Subsystem: 8086:5003
     Kernel driver in use: ixgbevf
     Kernel modules: ixgbevf
# lspci -s 00:09.0 -k -n
00:09.0 0200: 8086:1515 (rev 01)
     Subsystem: 8086:5003
     Kernel driver in use: ixgbevf
     Kernel modules: ixgbevf
3.2.2. SRIOV Network Operator configuration
The SR-IOV Network Operator is a critical component in OpenShift for enabling and managing high-performance networking through Single Root I/O Virtualization (SR-IOV). It streamlines a complex process that would otherwise require significant manual configuration and orchestration.
SRIOV Network Operator Installation
You can install the Single Root I/O Virtualization (SR-IOV) Network Operator on your cluster to manage SR-IOV network devices and network attachments through oc cli commands or directly through web console following the link.
See also
SR-IOV Network Operator Installation to find more informations from Red Hat Documentation.
Machine configuration
The selected machine should have the label network-sriov.capable=”true”. This can be done with the following command.
oc label node <node_name> feature.node.kubernetes.io/network-sriov.capable="true"
Machine SR-IOV resources
Virtual Functions should now be created from an interface that has been initially identified (mac address, nic model….). Create a file named sriov_net_config.yaml with the content below. The name of resources can be adapted according to needs.
See also
SR-IOV network node configuration object to find more informations from Red Hat Documentation.
apiVersion: sriovnetwork.openshift.io/v1
kind: SriovNetworkNodePolicy
metadata:
   name: node-net-1 (4)
   namespace: openshift-sriov-network-operator
spec:
   deviceType: netdevice (1)
   isRdma: true
   needVhostNet: true
   nicSelector:
      pfNames:
      - <interface_name> (2)
   nodeSelector:
      feature.node.kubernetes.io/network-sriov.capable: 'true'
      kubernetes.io/hostname: <node_name> (5)
   numVfs: 8
   priority: 99
   resourceName: net1 (3)
Main informations are:
deviceType: can be netdevice or vfio-pci. In practice, we use netdevice for mellanox and vfio-pci for intel devices. Refer to official documentation for more precisons.
pfNames: List of PF on which we want to create virtual functions
resourceName: which will help identify the resource.
name: name of the config. It should be unique.
The node on which we need to create the resources
Set isRdma to true and additionally set needVhostNet to true to configure a Mellanox NIC for use with Fast Datapath DPDK applications. You cannot set the isRdma parameter to true for intel NICs.
Create resource with command
oc create -f sriov_net_config.yaml
A reboot of the machine may be needed to create the resources. This is done automatically. After the reboot, the machine resources can be listed with:
oc describe node <node_name>
.
.
.
      Capacity:
         cpu:                        48
         ephemeral-storage:          975222512Ki
         hugepages-1Gi:              x
         hugepages-2Mi:              x
         memory:                     x
         openshift.io/net1:      8
SR-IOV networks
Now an sriov network can be created with the resource <openshift.io/net1> created above
apiVersion: sriovnetwork.openshift.io/v1
kind: SriovNetwork
metadata:
   name: <network_name>
   namespace: openshift-sriov-network-operator
spec:
   resourceName: net1
   networkNamespace: default
   vlan: <vlan>
   ipam: |-
      {}
   linkState: enable
Main informations are:
network_name : The name of the resource that will be used in helm configuration
vlan: The default value is 0, which means no vlan
See also
SR-IOV network configuration to find more informations about SriovNetwork.
You can list the networks with following command
oc get sriovnetworks.sriovnetwork.openshift.io -n openshift-sriov-network-operator
3.2.3. Helm Charts Deployment
We will use two helm charts for the Virtual Service Router container deployment. The first one is dedicated to the deployment of the SR-IOV network device plugin and its related configuration. The first one can be skipped if you rely on SR-IOV network Operator. The second one is dedicated to the deployment of the Virtual Service Router pod which has relationships with the SR-IOV configuration.
Warning
The NIC we used is not part of those supported by the OpenShift SR-IOV Network Operator. It is why we used the SR-IOV network device plugin and not the OpenShift SR-IOV Network Operator.
See also
sr-iov hardware networks to find more informations from Red Hat Documentation.
On the host machine, create a directory (for example, in your home directory).
# mkdir vsr-install
Copy both helm packages (.tgz files) from Helm Charts templates folder
into the previous directory created in the host machine.
Note
Those files can be downloaded from the 6WIND deployment guide repository.
Go to this directory:
# cd vsr-install
SR-IOV Network Device Plugin Chart
You can skip this section, if you rely on SR-IOV network Operator. We will deploy the first helm chart related to SR-IOV network device plugin.
If you need to override default values from the chart, before deploying the chart, you can check the configurable values:
# helm show values sriov-config-0.1.0.tgz
netattach:
  sriov:
   name: sriov
   resourcePrefix: intel.com
   resourceName: sriovpass
  sriov2:
   name: sriov2
   resourcePrefix: intel.com
   resourceName: sriovpass2
config:
  config1:
    resourcePrefix: intel.com
    resourceName: sriovpass
    vendor: 8086
    devices: 1515
    drivers: ixgbevf
    pciAddresses: 0000:00:08.0
  config2:
    resourcePrefix: intel.com
    resourceName: sriovpass2
    vendor: 8086
    devices: 1515
    drivers: ixgbevf
    pciAddresses: 0000:00:09.0
and update needed values at your convenience, for example:
# helm install sriov-config-0.1.0.tgz --set config.config1.pciAddresses="0000:00:05.0" --generate-name
or for example to add an SR-IOV network:
# helm install sriov-config-0.1.0.tgz \
    --set config.config3.pciAddresses="0000:00:05.0" \
    --set config.config3.pciAddresses="0000:00:05.0" \
    --set config.config3.resourcePrefix="intel.com" \
    --set config.config3.resourceName="sriovpass3" \
    --set config.config3.vendor="8086" \
    --set config.config3.devices="1515" \
    --set config.config3.drivers="ixgbevf" \
    --generate-name
In that case, when you have several updates (modifications, additions), to avoid to have a long command, it is better to use a file to define your values. Create a file with custom values as follows:
netattach:
  sriov:
    name: sriov
    resourcePrefix: intel.com
    resourceName: sriovpass
  sriov2:
    name: sriov2
    resourcePrefix: intel.com
    resourceName: sriovpass2
  sriov3:
    name: sriov3
    resourcePrefix: intel.com
    resourceName: sriovpass3
config:
  config1:
    resourcePrefix: intel.com
    resourceName: sriovpass
    vendor: 8086
    devices: 1515
    drivers: ixgbevf
    pciAddresses: 0000:00:03.0
  config2:
    resourcePrefix: intel.com
    resourceName: sriovpass2
    vendor: 8086
    devices: 1515
    drivers: ixgbevf
    pciAddresses: 0000:00:04.0
  config3:
    resourcePrefix: intel.com
    resourceName: sriovpass3
    vendor: 8086
    devices: 1515
    drivers: ixgbevf
    pciAddresses: 0000:00:05.0
and deploy the chart with those custom values:
# helm install -f custom-values-example.yml sriov-config-0.1.0.tgz --generate-name
# helm install sriov-config-0.1.0.tgz --generate-name
Check that this chart is correctly deployed:
# helm ls
NAME                         NAMESPACE       REVISION        UPDATED                                 STATUS          CHART                   APP VERSION
sriov-config-0-1672340713    default         1               2022-12-29 20:05:13.126958274 +0100 CET deployed        sriov-config-0.1.0      3.4.0
# helm status sriov-config-0-1672340713
NAME: sriov-config-0-1672340713
LAST DEPLOYED: Thu Dec 29 20:05:13 2022
NAMESPACE: default
STATUS: deployed
REVISION: 1
TEST SUITE: None
# oc get pods -n kube-system
NAME                                   READY   STATUS    RESTARTS   AGE
kube-sriov-device-plugin-amd64-5bnkt   1/1     Running   0          8m31s
If you need to delete all resources created in the cluster through the chart deployment:
# helm ls
NAME                         NAMESPACE       REVISION        UPDATED                                 STATUS          CHART                   APP VERSION
sriov-config-0-1672344558    default         1               2022-12-29 21:09:18.133823643 +0100 CET deployed        sriov-config-0.1.0      3.4.0
# helm uninstall sriov-config-0-1672344558
release "sriov-config-0-1672344558" uninstalled
# helm ls
NAME NAMESPACE       REVISION        UPDATED STATUS  CHART   APP VERSION
# oc get pods -n kube-system
No resources found in kube-system namespace.
VSR CNF Chart
In the Virtual Service Router helm chart, we use a dedicated Service Account , “vsr-user”, in the default namespace.
To create the “vsr-user” Service Account in the default namespace:
# oc create sa vsr-user
serviceaccount/vsr-user created
Before deploying the Virtual Service Router helm chart, you need to bind a Security Context Constraint to the “vsr-user” service account in the default namespace:
# oc adm policy add-scc-to-user privileged -n default -z vsr-user
clusterrole.rbac.authorization.k8s.io/system:openshift:scc:privileged added: "vsr-user"
Note
In OCP, you can use Security Context Constraints to control permissions. There are default Security Context Constraints (SCCs). In our case, we used the privileged one. However, you can create your custom SCC in accordance with your needs and requirements.
See also
OpenShift Security Context Constraints to get more informations from Red Hat Documentation about Security Context Constraints.
Before deploying the Virtual Service Router helm chart, you need to set the secret to pull the Virtual Service Router container image from the 6WIND docker repository.
First, generate a podman JSON configuration:
# dnf install podman
# podman login download.6wind.com
Username: <your email>
Password: <your password>
This creates a file ${XDG_RUNTIME_DIR}/containers/auth.json that is
reused in next command.
# oc create secret generic regcred \
  --from-file=${XDG_RUNTIME_DIR}/containers/auth.json \
  --type=kubernetes.io/dockerconfigjson
secret/regcred created
If you need to override default values from the chart, before deploying the chart, you can first check the values you can update:
# helm show values vsr-0.1.0.tgz
Warning
Pay attention that values related to ports/resource_name should match with
the values config/resourcePrefix and config/resourceName you set during
the deployment of the SR-IOV network device plugin chart.
Deploy the helm chart related to the Virtual Service Router pod. A custom value file can be passed to helm with param -f <file name> Example of value file when resources have been created with sriov Operator.
ports:
- name: <attachment_name>
  resource_name: openshift.io/net1
# helm install vsr-0.1.0.tgz --generate-name
With custom values:
# helm install vsr-0.1.0.tgz --generate-name -f custom_file.yml
Check this chart is correctly deployed:
# helm ls
[...]
vsr-0-1672347646             default         1               2022-12-29 22:00:46.931076967 +0100 CET deployed        vsr-0.1.0               3.4.7
# helm status vsr-0-1672347646
NAME: vsr-0-1672347646
LAST DEPLOYED: Thu Dec 29 22:00:46 2022
NAMESPACE: default
STATUS: deployed
REVISION: 1
TEST SUITE: None
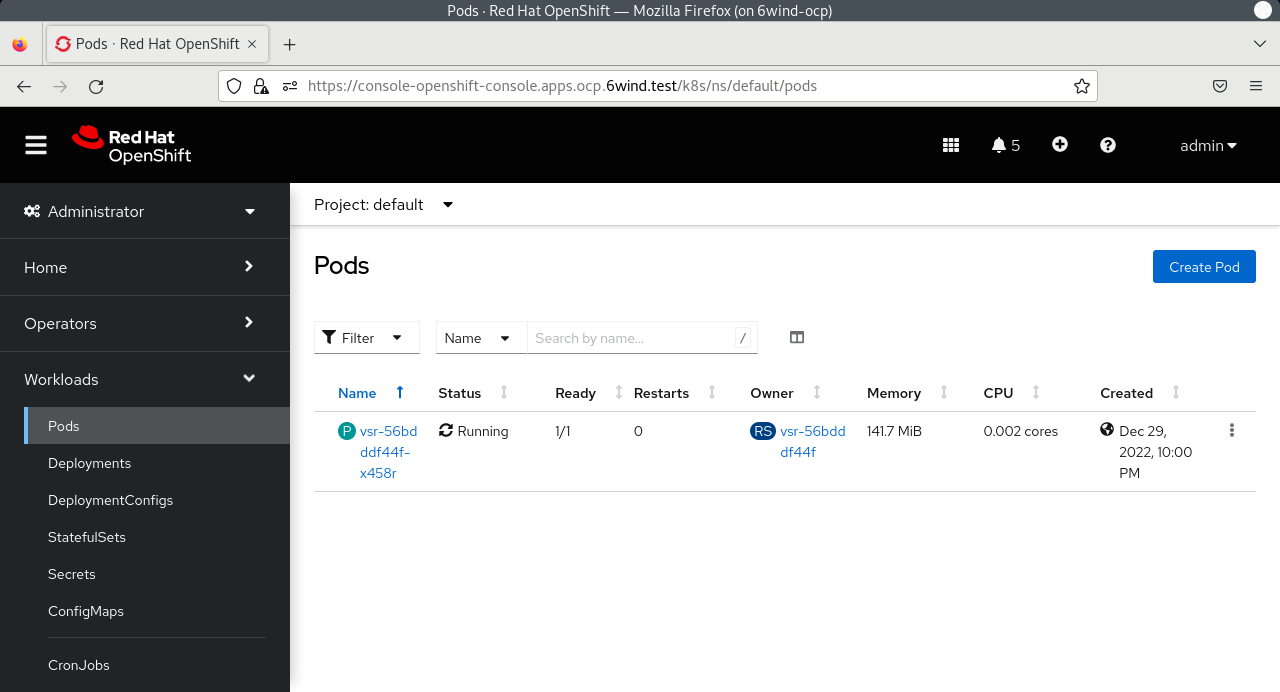
# oc get pods
NAME                   READY   STATUS    RESTARTS   AGE
vsr-56bdddf44f-x458r   1/1     Running   0          4m18s
From the host machine, open a web browser and go to the following link:
https://console-openshift-console.apps.<cname>.<dname>
where <cname> is to be replaced by the cluster name and <dname> by the domain
defined in the previous file: sno_vars.yml.
Then log in with htpasswd_provider with credentials ocp_user and ocp_pass
defined in the previous file: sno_vars.yml.
Warning
You have to deploy first the helm chart related to the SR-IOV plugin, ensure that one is correctly deployed and then deploy the helm chart related to the Virtual Service Router pod.
See also
Helm Documentation to find more informations about Helm.
Finally, you can access to the vsr pod:
# oc exec -it vsr-56bdddf44f-x458r -- login
Note
The default login is admin / 6windos
and configure the Virtual Service Router container. Please refer to the Virtual Service Router Getting Started Guide.
If needed, to remove all resources created in the cluster:
# helm ls
NAME                         NAMESPACE       REVISION        UPDATED                                 STATUS          CHART                   APP VERSION
sriov-config-0-1672347602    default         1               2022-12-29 22:00:02.702000727 +0100 CET deployed        sriov-config-0.1.0      3.4.0
vsr-0-1672347646             default         1               2022-12-29 22:00:46.931076967 +0100 CET deployed        vsr-0.1.0               3.4.7
# helm uninstall vsr-0-1672347646
release "vsr-0-1672347646" uninstalled
# helm uninstall sriov-config-0-1672347602
release "sriov-config-0-1672347602" uninstalled
Warning
You have to uninstall first the helm chart related to the Virtual Service Router pod, and then uninstall the helm chart related to the SR-IOV device plugin.